Metaface widget user guide
Usage
The Metaface widget is a simple payment wizard to easily collect donations from your website. It can be easily integrated with Google Analytics to track the flow of the donations and automatically adapts to every size and device. It consist of 3 successive steps, which can be customized in order, requirements and appearance:
Donation step (Your donation)
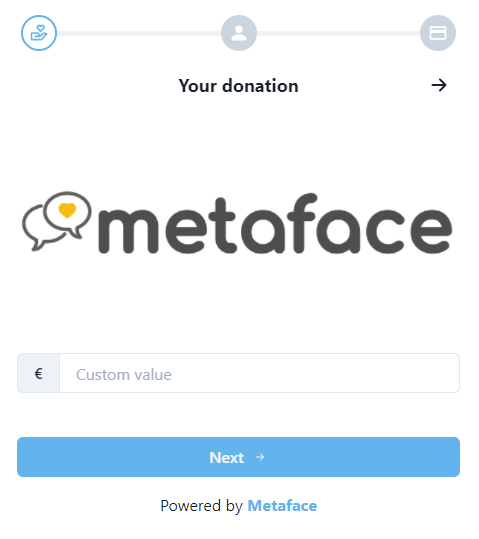
In the donation step your donors can set the amount and the frequency of the donation. You can set up this step with predefined amounts or/and a free number field to allow users to customize the amount of the donation.
Donor step (Your contacts)
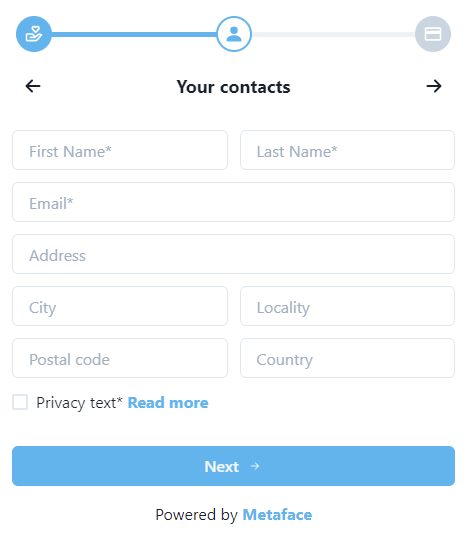
In this step you can collect the information about the donor. You can set which field you want to display and which of them to make mandatory.
Payment step (Payment)
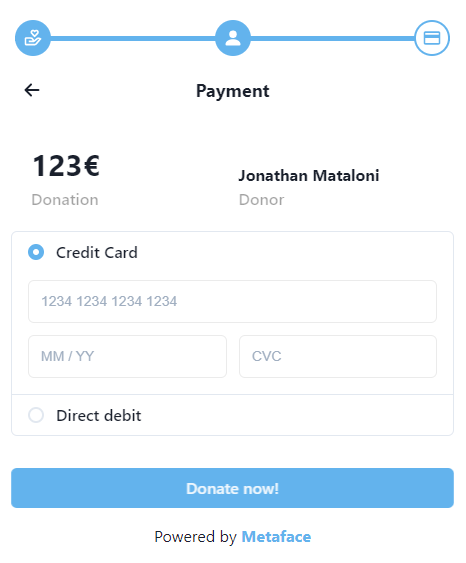
This is the final step, where your donor can view a summary of the donation and select the payment method they want to use and pay.
Widget creation and setup
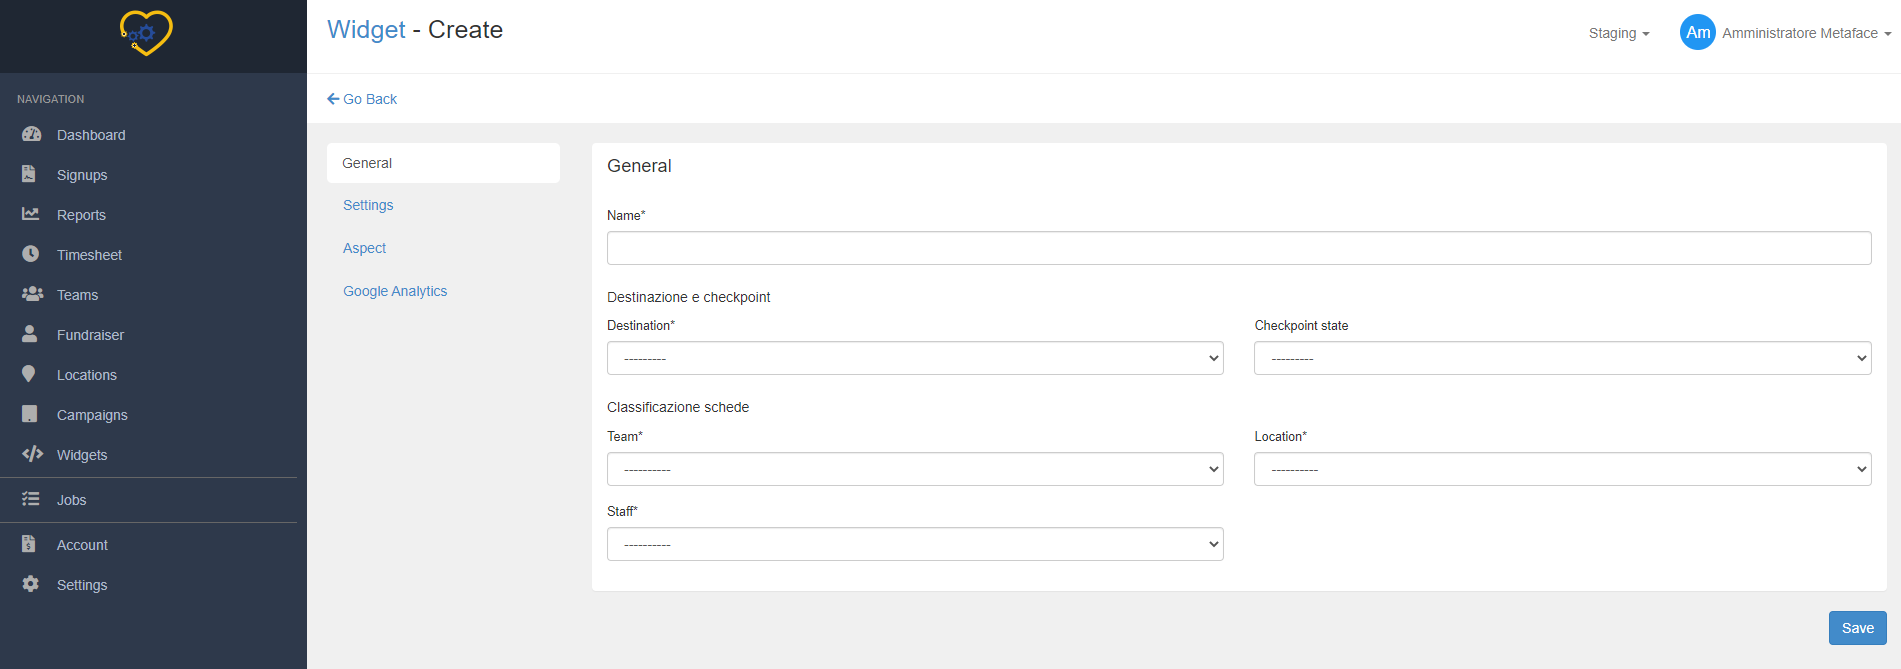
Create a new widget from your Metaface web app by navigating to the "Widget" page and clicking "Add new widget”.
Tab “General”
| Field | Description |
|---|---|
| Name | The name of the widget. It will only be displayed in the Metaface web app |
| Destination | Lorem Ipsum |
| Checkpoint state | Lorem Ipsum |
| Team | Lorem Ipsum |
| Location | Lorem Ipsum |
| Staff | Lorem Ipsum |
Tab “Settings”
| Field | Description |
|---|---|
| Default payment | Set the payment method displayed by default when user comes in the Payment step |
| Privacy text | The text displayed near the Privacy checkbox in the Donor step |
| Privacy link | The link to the “Read more” text near the Privacy checkbox in the Donor step |
| Ask address | If checked, adds the fields Country, City, Address, Locality and Postal code in the Donor step |
| Ask email | If checked, adds the field Email in the Donor step |
| Ask phone | If checked, adds the field Phone in the Donor step |
| Redirect link | The link to the success page if the payment is successful. If not set, a default message will be displayed |
Tab “Aspect”
| Field | Description |
|---|---|
| Theme color | The main color of the components of the widget expressed in HEX notation, ideally the primary color of your website/brand |
| Page order | You can choose the order of Donor and Donation steps. The payment step will always be at the end of the wizard |
| Frequency order | Select the order of the predefined amount buttons in the Donation step (ascending or descending) |
| Cover image | Set the cover image that will appear in the Donate step |
| Cover text | Set the description text that will appear in the Donate step |
Tab “Google Analytics"
| Field | Description |
|---|---|
| GA add donation action | Action name of the GA event triggered on “Donate now” button press in the Payment step |
| GA add donation category | Property event_category of the GA event triggered on “Donate now” button press in the Payment step |
| GA add donation label | Property event_label of the GA event triggered on “Donate now” button press in the Payment step |
| GA add donation value | Property value of the GA event triggered on “Donate now” button press in the Payment step |
| GA signup action | Action name of the GA event triggered on “Next” button press in the Donor step |
| GA signup category | Property event_category of the GA event triggered on “Next” button press in the Donor step |
| GA signup label | Property event_label of the GA event triggered on “Next” button press in the Donor step |
| GA signup value | Property value of the GA event triggered on “Next” button press in the Donor step |
| GA begin checkout action | Action name of the GA event triggered on “Next” button press in the Donation step |
| GA begin checkout category | Property event_category of the GA event triggered on “Next” button press in the Donation step |
| GA begin checkout label | Property event_label of the GA event triggered on “Next” button press in the Donation step |
| GA begin checkout value | Property value of the GA event triggered on “Next” button press in the Donation step |
After completing the widget configuration, click the "Save" button to generate the HTML code to embed the widget on your website or web page.
Implementation
To insert the widget in your web page you need the script generated by Metaface in the "Embed code" section of the "Widget" page, which looks like the image below:

After retrieving the script, you can put it directly in your HTML code or implement it in your CMS.
The "trackingCode" attribute
The widget is deployed without any linked campaigns by default. If you want donations to be collected in a specific campaign, you need to add a "trackingCode" attribute to the widget script tag with the target campaign code as the value, like below:
<script
  src="https://widget.metaface.it/shim.js"
  domain="YOUR_DOMAIN"
  token="YOUR_TOKEN"
  trackingCode="YOUR_CAMPAIGN_CODE"
  ></script>
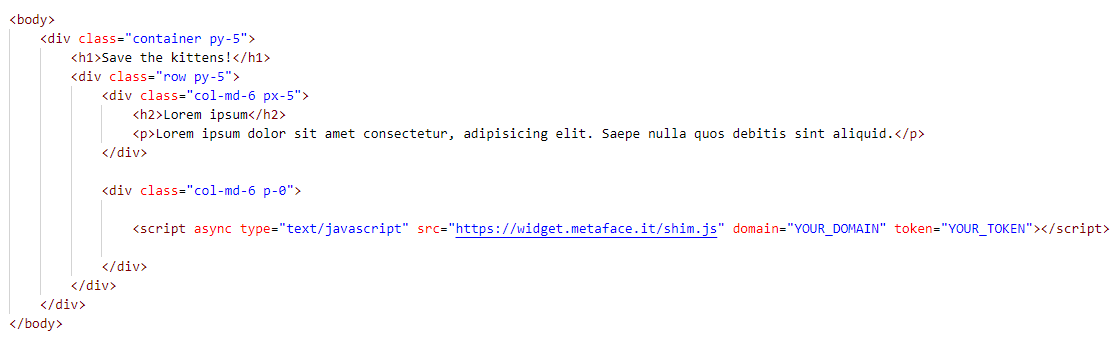
HTML code
You can put the script in a <div> tag directly in the HTML code of your web page.
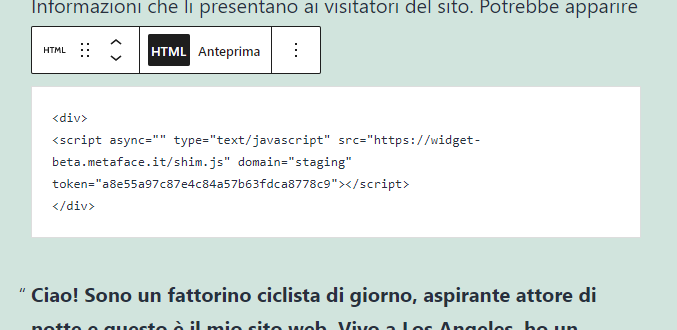
Wordpress
Open the page editor of your Wordpress website and create a new “Custom HTML” block (you can find it in the “Widget” section) and place it in your page.
Note: The widget inherits the height and width of the parent div and is designed to resize its components in a responsive way. You can constrain its size by setting the height and the width of the parent div.
Integration with Google Analytics
First, if you have not already done so, set up your Google Analytics account following this guide:
https://support.google.com/analytics/answer/1008015?hl=en
Copy and paste the global site tag after the opening <head> tag on each page you want to measure.
The widget will automatically search for the window.gtag object and send the GA events as configured in the Google Analytics tab in the Metaface web app.